Skills Gap 2: Character Modelling - Part 3
- 723799
- Oct 29, 2023
- 3 min read
Retopology
Unlike sculpting, I enjoyed retopology considerably less.
It involves going over the entire model and meticulously covering it in planes in order to lower the vert count of the final model (and make it possible to do a few of the later steps.)

Something that made this process much easier was painting on a plan of how things would be covered.

With the help of the video tutorial, I made coloured markings to indicate loops that had to be made and simplify it overall.

The retopology is a simple, but tedious task. It starts with a single plain that is snapped on top of the sculpt and extruded over and over until the entire sculpt is covered.


The most important tools for this task are the mirror modifier, shrink wrap modifier and the snap tool.
The snap tool just means that when moving a vert in front of the sculpt it will move along it’s surface, this allows you to easily get the right angles for the faces.
The mirror modifier is self-explanatory, it simply mirrors the work you’ve done, essentially halving the work you’d have to do.
I’m able to do most of the head quite quickly, although I suffered a crash just before finishing which lost me about an hour of progress.


The worst part of the head topology was definitely the ears.
They where very awkwardly shaped, they were hard to navigate around with the blender controls, the visibility was terrible and it turned out quite messy.

After finishing the ear, some finishing touches were needed. I first used the smoothing slide relax tool in sculpt mode to sort out the topology to make it look more presentable.


Then I added a subdivision modifier and shaded it smooth and it was already looking quite good.
But to add some detail back in, I went in to edit mode and sharpened some edges.


These same steps are repeated as i extrude down the body.


The hands are definitely the hardest of the topology to do. They have all the same problems, but unlike the ears it is important that they don’t end up a mess or they will cause a problem when rigging and making clothing.
The guide was very helpful, but I didn’t position the hands and arms very well when I did the blocking out. This meant it was much harder for me to line them up and make sure the verts were in the right places than it was for the guy in the tutorial video.
Attaching the hand to the wrist also ended up messy, but that was to be expected.
The final step before rigging was adding a mouth and teeth.

The main mouth area was just extruded from the lips so that it would move with them when rigged.

The teeth are made from a subdivided cube being bent into a curve and mirrored. It is then given loop cuts that can be moved around to form the shape of teeth.

The gum mis made from the tops of the teeth, duplicated and extruded.

The teeth and a tongue made from another subdivided cube are just fit into the mouth. Roughly where they are supposed to be.

Rigging
The rig was simple. It was just about getting the bones, from blenders human armature meta rig, in the right positions.
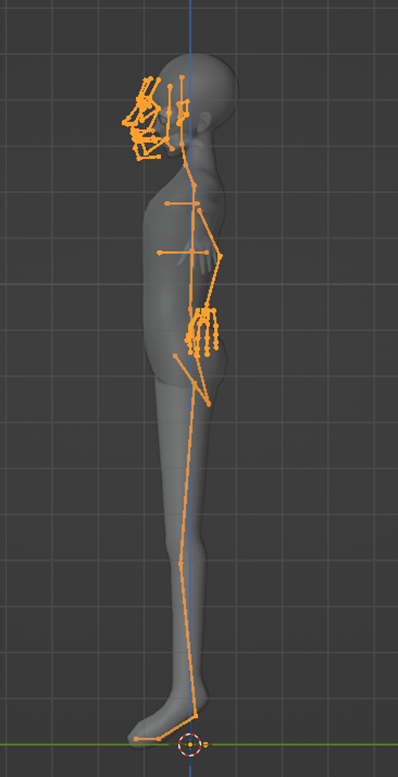


Then using the rigifiy addon I can create a rig from the meta rig.


I did face one problem though, the verts on my model were too close to automatically weight them for the rig. Luckily someone in the comment section of the tutorial had the same problem and was able to solve it by scaling their model up before applying automatic weights.
I did the solution and the rigging was mostly done.
Lastly I had to assign the teeth, tongue and eyes to their corresponding bones.

And with that the rigging was done!

Next time I'll have given my model some hair and clothes, it will most likely be the last thing I do with it until my 3rd skills gap.


Comments